
Anyone with a linux server has experienced alot of login tries in SSH. A quick “fix” for that is to change the default port away from 22, but even then, someone WILL try to bruteforce you.
It is rather simple to ensure that noone will bruteforce your server. Let’s first discuss the differences in authentication factors. In general there are up to three factors of authentication.
- Knowledge – Something you know, which can be told to others. (Password, PIN etc)
- Possession – Something you have, which can be handed to others (Keys, magnetic stribe cards, smart cards etc.)
- Inherence – Something you are, which cannot be given or told others. (Biometric, eye scanning, fingerprint etc.)
Most services in the world is based on knowledge, since you got a username and password. Both can be told to others. This is also most likely the most used authentication when using SSH. Knowledge can rather easily be brute forced, stolen, fished and so on which is why we need a second factor. Just like most banks who require you have a username/password and a keycard or similar.
The inherence factor is very rarely used for consumers. That said, many people have the fingerprint reader on their laptop. This is normally not used, and hard to implement, for SSH.
This means we have two factors left – knowledge and possession – which is perfect since this post is regarding two factor authentication. Most likely you will already use passwords, so this factor will not be covered here. Not much to cover really.
In this post I will cover two different possibilities of two factor authentication. Keys and validation.
Keys
I’ve always liked keys, because they are supported almost everywhere. There are only two things you need to master when handling keys. How to store them and how to name them. Many people has several keys for different purposes/services to increase security. Here, I will only cover a single key pair.
First, we need to create the keys. On your linux/unix/mac write this command
ssh-keygen -t rsaIt will ask your for a location and filename to save the file. Just press enter.
Generating public/private rsa key pair.
Enter file in which to save the key (/root/.ssh/id_rsa):
Next, you will be prompted for a password. You should always use passwords for your keys. If you dont, it’s no better than just using a username/password login instead. To password protect your keys is what ensure you have two factor. Because you need to key and you need the password for the key also. Neither will work on their own. So enter that password now!
Enter passphrase (empty for no passphrase):
Enter same passphrase again:
Now you are set. You should get this output:
Your identification has been saved in /root/.ssh/id_rsa.
Your public key has been saved in /root/.ssh/id_rsa.pub.
The key fingerprint is:
04:03:8f:0f:82:3d:3e:06:05:29:34:7b:d6:51:9d:92 root@vps
The key's randomart image is:
+--[ RSA 2048]----+
|o=. .o+.o .      |
|o+o .o.E o       |
|+.+oo.. o        |
| ooo o .         |
|  +   . S        |
| . .             |
|                 |
|                 |
|                 |
+-----------------+
Now you have two keys in your .ssh folder. A id_rsa (private key) and id_rsa.pub (public key). id_rsa is the key you need to backup safely and keep out of reach from everyone else.
Validation
There are several libraries and possibilities for how to add a validator, but currently I’m using the Google Authenticator. And since my servers are almost always Centos I’ll focus on latest release, version 7.
Make sure CentOS is updated
yum -y updateNext, install the ‘pam-devel‘ package which allows you to set authentication policies without having to recompile programs that handle authentication.
yum -y install pam-develMake sure that ntpd is installed and running because the TOTP security tokens are very time sensitive
yum -y install ntp
/etc/init.d/ntpd start
chkconfig ntpd on
Download and unpack the Google authenticator package. You may wanna browse google to make sure you get the latest stable release and not just the one I’m linking.
cd /opt/
wget https://google-authenticator.googlecode.com/files/libpam-google-authenticator-1.0-source.tar.bz2
tar -xvzf libpam-google-authenticator-1.0-source.tar.bz2
cd libpam-google-authenticator-1.0
Compile and install the Google authenticator module
make
make install
If you like, you can delete the build folder. Nive to clean up a bit.
rm -rf /opt/libpam-google-authenticator-1.0For each user, you will have torun the following command to setup the “config” for that user
google-authenticatorIt will ask you four questions which you most likely will answer yes to. Read them and decide for yourself. Before the questions it will also output a QR code and some codes/keys
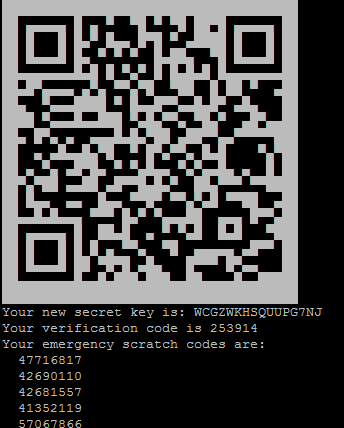
What you should notice from above, is three thing. Secret key, verification code and emergency scratch codes.
Secret key is the most important and most secret peice of information. This key is what you will need for the authenticator application. Wether it’s Android, Apple OS, Windows or some other library, the key is what you need to keep a secret. It is the core information when calculating temporary codes.
Verification code is not important since it’s only valid for the next 30 seconds or so. This is just an example of what you can expect from your authentication application.
The emergency scratch codes should be saved and locked away. These codes are always valid, no matter what the authentication apllication says. This is your way in, if you loose your phone or if you are simply unable to read the verification code.
The QR code is for your convenience. If you have Google Authenticator on your phone, or chrome extension, you can simply scan to setup the authenticator. Otherwise, just use the secret key.
Activate GAuth
You have now installed the Google authentication module, but it is not yet activated. Edit the pam ssh configuration.
vim /etc/pam.d/sshdAdd the following line. Personally i would put it at the top ensure that users are first prompted by the verification code, and next their username and password. It will make it almost impossible to attempt to bruteforce.
auth required pam_google_authenticator.so nullokNext, you need to tell SSH to ask for the verification code by editing the config.
vim /etc/ssh/sshd_configLook for this line and make sure it’s set to yes and there is no hash sign in front of if.
ChallengeResponseAuthentication yesWe have to restart the SSH deamon. On CentOS 7 it is done as such:
systemctl restart sshd.serviceIf you try to ssh to the server now, you will be prompted for a verification code before you can enter username and password. Congratulations, you have two factor security now!
Note: If you already use SSH keys, you will NOT be prompted for a verification code! But that is ok since SSH keys is already two factor.
Tweaking
If you are not using SSH keys, it can be annoying over time time keep entering the validation key each time. There are different ways to mitigate this, but I will only show one solution here which covers the most.
We need to edit pam ssh settings again.
vim /etc/pam.d/sshdYou remmeber we entered an auth line at the top. What we need to do now is to insert this line ABOVE the previously inserted line.
auth [success=1 default=ignore] pam_access.so accessfile=/etc/security/access-local.confThe access file needs to be created and get values.
vim /etc/security/access-local.confInsert this in the file, but remember to modify it to suit your needs.
# Two-factor can be skipped on local network
+ : ALL : 10.0.0.0/24
+ : acoon : ALL
- : ALL : ALL
The file will be read top-down. The plus sign is the entries that will NOT be asked to use verification code. Meaning that logins from 10.0.0.0/24 will not be asked for 2FA, but just regular authentication. The user ‘acoon’ is never asked for 2FA not matter what IP the connection originate from.
Lastly, I ensure that everyone else is using verification codes.
You can read more on access config here.